10 Easy Mehndi Designs for Beginners: Master the Art of Simplicity
Mehndi, also known as henna, is a beautiful and intricate form of body art that has been practiced for centuries. It is traditionally applied during weddings, festivals, and other special occasions in many cultures around the world. While intricate and complex mehndi designs can be mesmerizing, beginners may find them daunting to recreate. However, mastering the art of simplicity can be a great starting point for beginners to dip their toes into the world of mehndi. In this article, we will explore ten easy mehndi designs that beginners can try to enhance their skills and create stunning designs with simplicity.
Table of Contents
- Introduction
- Understanding Mehndi and Its Origins
- Tools and Materials Needed
- Basic Techniques for Applying Mehndi
- Design 1: Floral Vine
- Design 2: Peacock Feather
- Design 3: Mandala
- Design 4: Paisley
- Design 5: Arabic Pattern
- Design 6: Heart Shape
- Design 7: Geometric Patterns
- Design 8: Simple Bracelet
- Design 9: Single Finger Design
- Design 10: Half Hand Design
- Conclusion
- Frequently Asked Questions (FAQs)
Introduction
Mehndi is an ancient art form that involves creating intricate patterns on the skin using henna paste. It has been practiced for centuries in various cultures, including India, Pakistan, and the Middle East. Mehndi designs can be simple or elaborate, depending on personal preferences and the occasion. For beginners, starting with easy designs can help build confidence and develop the necessary skills to create more complex patterns in the future.
Understanding Mehndi and Its Origins
Mehndi has a rich cultural history and is deeply rooted in traditions. It is believed to have originated in ancient India and gradually spread to other parts of the world. Mehndi holds great significance in weddings and other celebratory events, symbolizing love, joy, and good luck. The natural dye of henna leaves is used to create intricate designs on the skin, which gradually darken over time, leaving behind a beautiful stain.
Tools and Materials Needed
Before diving into the world of mehndi, it’s essential to gather the necessary tools and materials. Here are the items you’ll need:
Fresh henna paste or henna cones
Plastic squeeze bottle or applicator cones
Fine-tipped applicator or toothpick
Lemon juice or sugar water (to enhance henna color)
Tissues or cotton balls
Design stencils or reference images (optional)
Basic Techniques for Applying Mehndi
To ensure a smooth application and clean designs, it’s crucial to understand some basic techniques. Kindly compose your text in the English language.
Start with clean, dry skin: Wash and dry the area where you plan to apply mehndi to remove any oils or lotions that may interfere with the staining process.
Practice consistency: Achieving the right consistency of henna paste is key. It should be smooth and not too runny to ensure precise control while applying.
Pencil in your design: Before applying the henna, lightly sketch the design on the skin with a pencil. This will act as a guide and help you maintain symmetry and proportion.
Apply gentle pressure: When using an applicator, squeeze it gently to create a steady flow of henna. Applying too much pressure may result in thicker lines and uneven designs.
Allow proper drying time: Let the applied henna paste dry completely to avoid smudging or smearing. It usually takes 1-2 hours for the henna to dry, depending on the climate.
Now, let’s explore ten easy mehndi designs that beginners can try:

Design 1: Floral Vine
This beautiful design features a delicate floral vine that can be drawn on the back of the hand or forearm.
Description: Start with a small flower in the center and create a vine by extending curved lines from the flower. Add leaves along the vine at regular intervals to complete the design.

Design 2: Peacock Feather
Capture the elegance of a peacock feather with this simple yet stunning mehndi design.
Description: Begin by drawing a long, slender shape resembling a feather. Add intricate details such as eye-shaped patterns and delicate lines to mimic the features of a peacock feather.
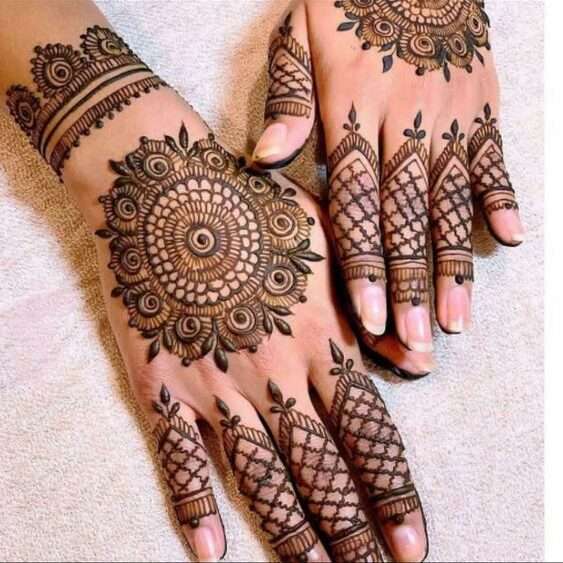
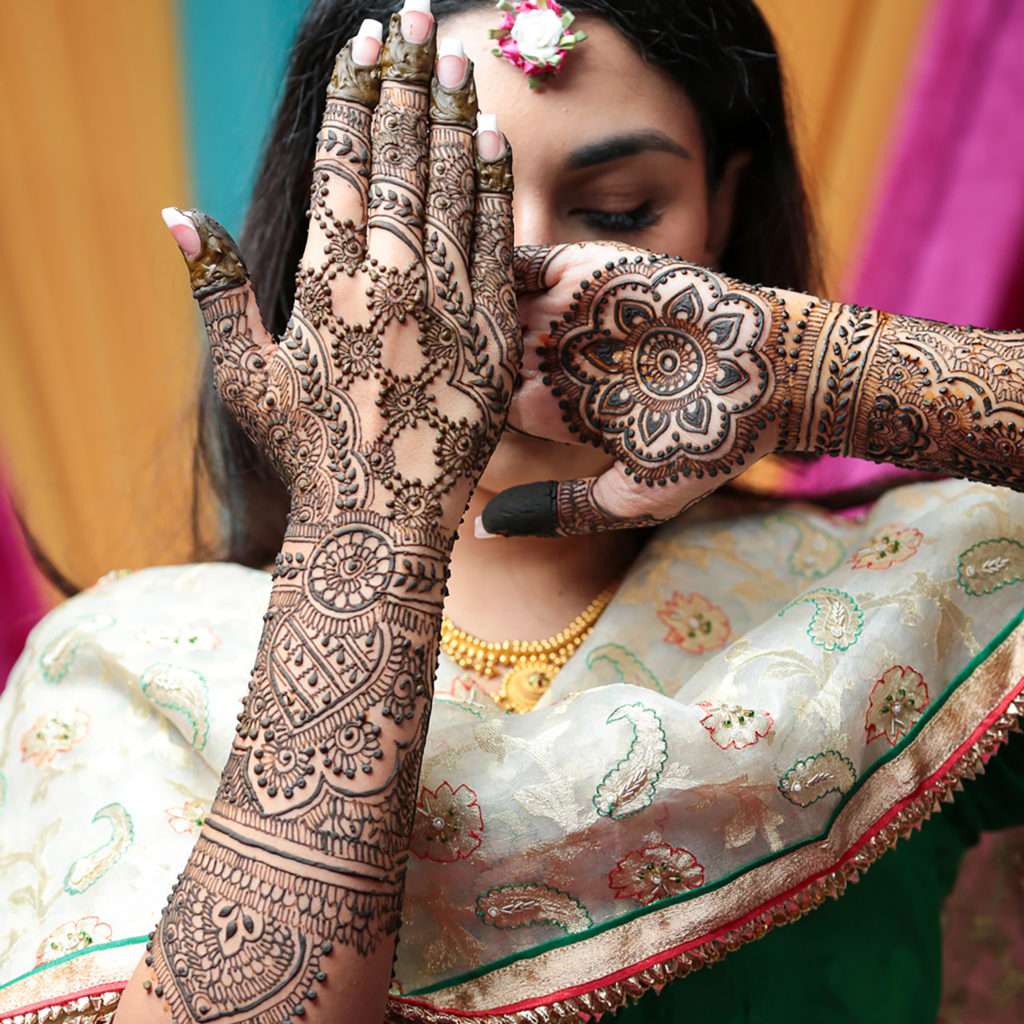
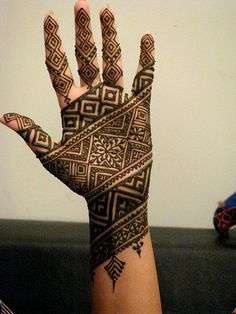
Design 3: Mandala
Create a mesmerizing mandala design on your palm with this easy-to-follow mehndi pattern.
Description: Start by drawing a central circle. Surround the circle with intricate geometric shapes and patterns. Add dots and lines to enhance the design further.
Design 4: Paisley
Embrace the classic paisley pattern with this effortless mehndi design for beginners.
Description: Begin by drawing a curved shape resembling a mango or a teardrop. Fill the shape with intricate paisley patterns. Repeat the shape in a symmetrical manner to create a beautiful overall design.
Design 5: Arabic Pattern
This design showcases the elegance of Arabic mehndi patterns with its bold lines and intricate details.
Description: Combine bold lines, geometric shapes, and floral motifs to create an Arabic-inspired mehndi design. Focus on symmetry and balance for a visually pleasing outcome.
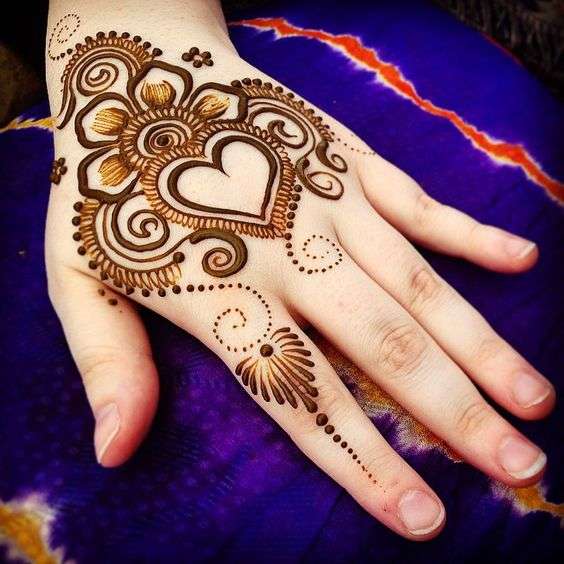
Design 6: Heart Shape
Express your love through this simple yet meaningful heart-shaped mehndi design.
Description: Draw a heart shape in the center of the palm or on the back of the hand. Embellish the heart with swirls, dots, or any other decorative elements of your choice.
Design 7: Geometric Patterns
Explore the world of geometry with this modern mehndi design that incorporates various geometric shapes.
Description: Combine squares, triangles, circles, and other geometric shapes to create an abstract pattern. Fill the shapes with intricate lines and dots for a visually striking effect.

Design 8: Simple Bracelet
Adorn your wrist with a simple and elegant mehndi bracelet design that adds a touch of charm to your look.
Description: Create a continuous line of intricate patterns around your wrist, resembling a bracelet. Experiment with different patterns such as flowers, leaves, or dots to personalize the design.
Design 9: Single Finger Design
Focus on a single finger with this minimalistic mehndi design that highlights simplicity and elegance.
Description: Decorate a single finger with delicate patterns, such as swirls, dots, or a miniature flower. This design can be applied on any finger or multiple fingers for a cohesive look.

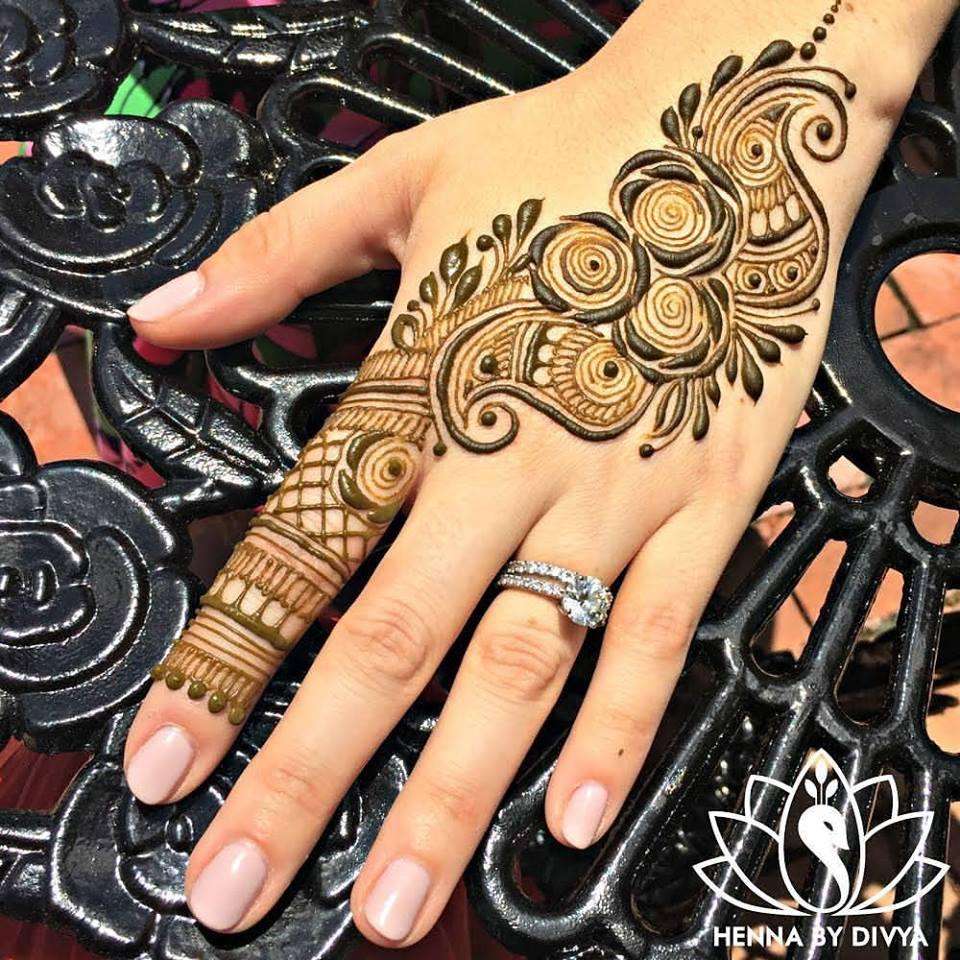
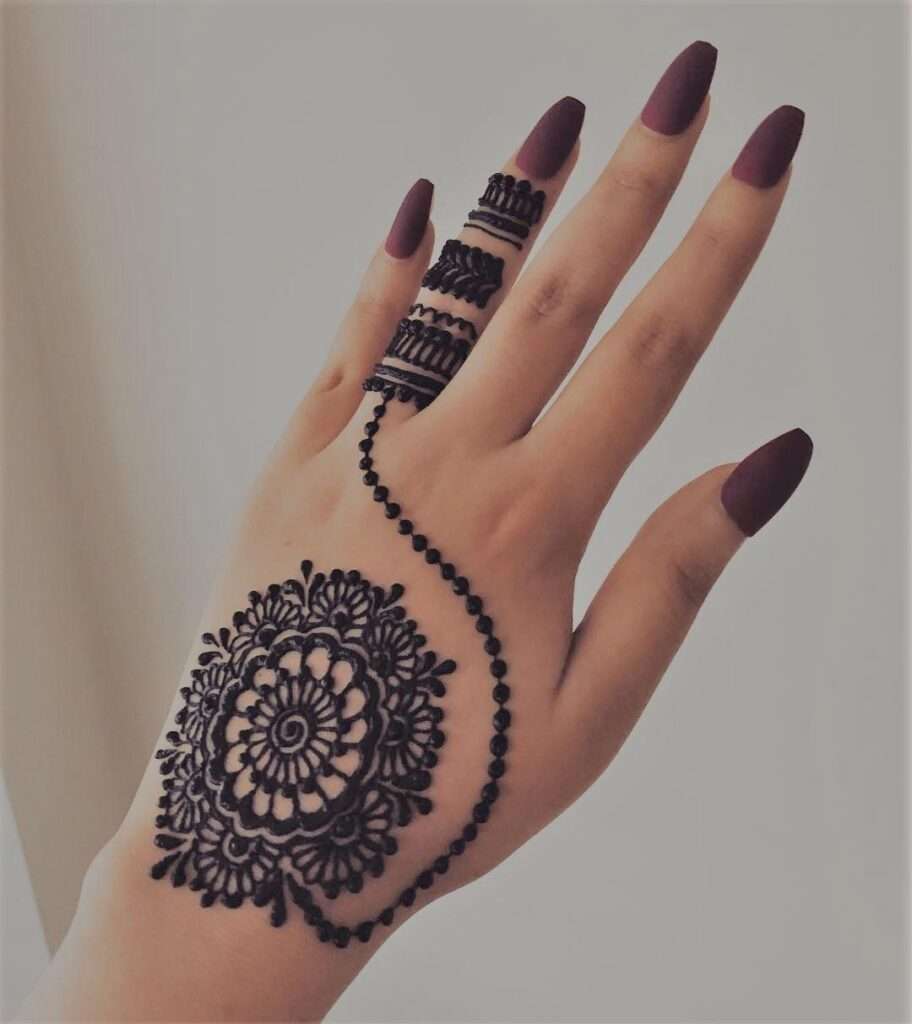
Design 10: Half Hand Design
For a more elaborate yet beginner-friendly design, try this half hand mehndi pattern that covers the back of the hand and extends to the wrist.
Description: Begin by drawing a central motif on the back of the hand. Extend the design to cover half of the hand, incorporating various elements like flowers, leaves, and geometric patterns. Finish the design by adding intricate details to the wrist area.
Conclusion
Mastering the art of simplicity in mehndi designs is an excellent way for beginners to explore this beautiful form of body art. With the ten easy designs discussed in this article, beginners can enhance their skills and create stunning mehndi patterns with confidence. Remember to practice the basic techniques, experiment with different designs, and allow your creativity to shine through.
More Designs :- https://rkpedia.com/2023/06/24/10-mehndi-designs/